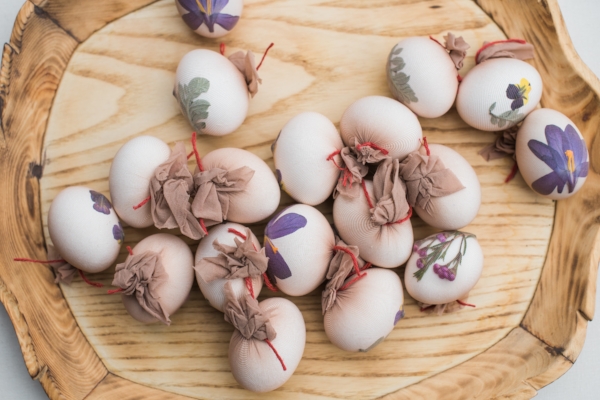
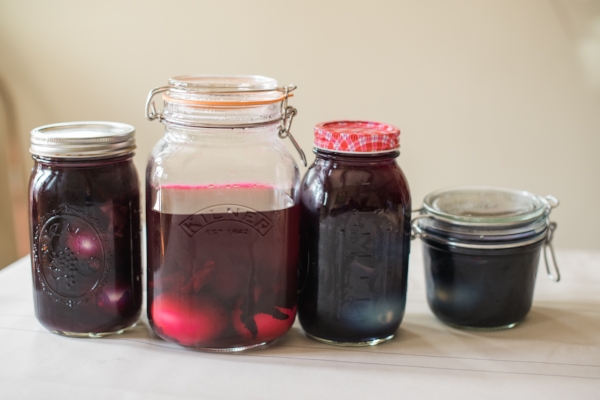
Our tradition the past 3 years has been to celebrate the start of spring with our naturally dyed flower imprinted Easter eggs. There's something to be said when you can appreciate each step of the process just as much as the end result. From the gathering of the first blooms in our yard, to the tying of the eggs, to the fishing out from the dye baths- each step generates so many "ohhh it's so beautiful!"s and "oh my goodness how precious!"s, reminding me to find comfort and contentment in this sweet journey of life. I thought I'd share our process for making ours in case you have yet to make your springtime eggs!
What You Need:
- 12-18 hard-boiled eggs (for instructions on hard boiling, here's a basic recipe!)
- old pantyhose (finally found a use for those old things in the back of your drawer!)
- string
- small fresh flowers and leaves
- vegetables for dyes (I used beets and red cabbage)
- white vinegar
Instructions:
- Prepare hard boil eggs and cut the old pantyhose into approximately 4 inch pieces. Since the whole process of flower imprinted eggs can be a bit more time consuming, I try and prep what I can without the kids so that when they are ready to dive in, I can have the materials all ready to go. This is an easy step that I can do the night before.
- Collect small flowers and leaves. This is one of my 5 year old twins' favorite part. We love walking our yard together and seeing what is popping up, and it's a little celebration of spring in itself. Usually not much is blooming yet, but the tiny flowers we find are just the perfect size for the eggs. Fern-shaped leaves also turn out beautifully.
- Prepare dye baths. Since the wrapping of the eggs can take a bit of time, I always get the dye baths going so they can boil while we wrap. I used this tutorial for preparing the dyes.
- While the dye baths are boiling, we wrap our eggs. The actual wrapping is difficult for children, so they help me with picking what they want to put on the egg and laying it on for me. Most flowers we put face down as it is easier to get flat that way.
- I then take a piece of the nylons and stretch it across the top of the flower and it press down and around the egg and gather it all in the back and twist it. Now that my kids know how to tie knots, they help me take the string and wrap it around tightly in the back while I hold the pantyhose in place (so I don't have to use my teeth to help me anymore to do it all myself ;)
- Enjoy the beauty of the flower pressed eggs in itself while the dye baths cool to room temperature :)
- Slowly drop the eggs into the dye bath jars. Usually, I keep it simple with just two dye colors. And in a 3rd jar I mix the two colors together to see what happens! Refrigerate until desired color is reached- we soaked ours overnight. This also teaches delayed gratification since you have to wait quite a bit!
- Fish out the eggs with a spoon and carefully cut the nylons open and remove from egg. Gently pat dry with a cloth and enjoy each unwrapping as your children squeal in delight!
The left ones were the beet and red cabbage dyes mixed- I expected them to turn more purple-y but perhaps I had more cabbage dye than beet! The middle ones were the red cabbage and were my favorite. The right were the ones soaked in the beet dye, which didn't come out as intensely pink as they had in years past but I love the subtle nature of them!
Thanks to Michelle @danceypantsdisco for inspiring me years ago to try this with my kids. I love that it is now our own little tradition.


